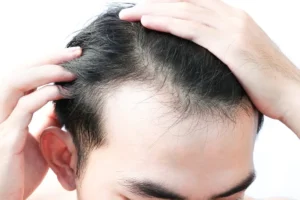
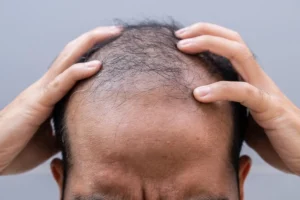
Seeing real hair transplant images before and after is often the first step for anyone considering a permanent solution to hair loss. Photographs provide a visual benchmark that helps you understand what a successful procedure looks like and set realistic expectations for your own journey. In fact, over 70% of prospective patients say that before‑and‑after galleries heavily influence their clinic choice.
This article walks you through how to evaluate those images, explains the different techniques that generate distinct visual outcomes, and highlights the key factors that affect the final look. Whether you are interested in a hairline transplant, a full scalp restoration, or a beard transplant before and after showcase, the insights below will guide you toward an informed decision.
We’ll also share practical tips on spotting authentic galleries, interpreting growth timelines, and why choosing a reputable center like Gold City Hair matters for achieving natural, lasting results.
Understanding What Before‑and‑After Photos Reveal
Before‑and‑after photos are more than just pretty pictures; they are clinical evidence of a surgeon’s skill and the technology used. A well‑documented set typically includes:
- Pre‑procedure close‑up of the donor and recipient areas.
- Immediate post‑procedure images (usually taken within 24‑48 hours).
- Progress shots at 3, 6, and 12 months to illustrate graft survival.
- Consistent lighting, angle, and background to ensure a fair comparison.
When you browse hair transplant images before and after, look for these consistency markers. Genuine clinics avoid dramatic Photoshop tricks and instead provide raw, unedited photographs that show the true density, hairline shape, and texture.
Another useful visual cue is the presence of a “before” image that captures the exact area of concern—whether it’s a receding hairline, a bald crown, or thinning eyebrows. The “after” shot should demonstrate clear improvement while maintaining a natural hair growth pattern.
Many patients also search for hair transplant before and after pictures that feature men and women of similar age and hair type, as this offers a realistic benchmark for personal results.

Common Hair Restoration Techniques and Their Visual Outcomes
Different transplant methods produce distinct patterns in the final photographs. Understanding these nuances helps you match the visual style you prefer with the appropriate technique.
Follicular Unit Extraction (FUE)
FUE involves harvesting individual follicular units from the donor area and implanting them into the recipient zone. The result is typically a natural‑looking hairline with minimal scarring, which is evident in close‑up before‑and‑after images.
Direct Hair Implantation (DHI)
DHI uses a specialized pen to place grafts at precise depths and angles, often yielding higher graft survival rates. Photos of DHI cases often show a denser crown and sharper definition of the hairline.
Strip Harvest (FUT)
While less common in Turkey today, FUT can still be seen in some galleries. The linear scar may be visible in close‑up “before” photos but disappears under longer hair in the “after” images.
| Technique | Typical Scarring | Ideal Candidate | Visual Signature in Photos |
|---|---|---|---|
| FUE | Micro‑dots, virtually invisible | Patients seeking minimal downtime | Clean donor area, natural hairline |
| DHI | None (same as FUE) | Those wanting higher graft precision | Denser crown, sharper hairline angles |
| FUT | Linear scar | Patients needing large graft numbers | Scar visible only when hair is short |
When you search for FUE hair transplant Turkey or hairline transplant results, the before‑and‑after galleries often highlight the seamless transition from donor to recipient zones, showcasing the meticulous work of skilled surgeons.
Factors That Influence the Quality of Before‑and‑After Images
Not every set of photographs tells the full story. Several variables can affect how impressive the results appear:
- Patient Age and Hair Type: Younger patients with thicker native hair often achieve denser looks faster.
- Graft Survival Rate: Higher survival (often above 90%) leads to fuller coverage in the 12‑month photos.
- Surgeon Experience: Skilled surgeons create natural angles and appropriate hairline placement.
- Post‑Operative Care: Proper medication and scalp care influence the healing process and final appearance.
- Photography Conditions: Consistent lighting, camera settings, and patient positioning are crucial for accurate comparison.
For those looking at hair transplant results for men versus women, note that female patients may have different density goals and often request a softer, more blended hairline.
Additionally, the presence of a beard transplant before and after series can illustrate how grafts integrate with facial hair characteristics, which differ from scalp hair in growth cycles and thickness.
Interpreting Results and Setting Realistic Expectations
Even the most impressive hair transplant images before and after are snapshots of a process that unfolds over a year. Understanding the growth phases helps you stay patient and satisfied.
Phase 1 – Shock Loss (Weeks 1‑4): Transplanted hairs often shed within the first two weeks. This is normal and does not indicate failure.
Phase 2 – Early Growth (Months 2‑4): Fine, almost invisible hairs begin to emerge. Images taken during this window may show modest improvement.
Phase 3 – Consolidation (Months 5‑9): Hair density increases noticeably. Most patients see the shape of their new hairline during this period.
Phase 4 – Maturation (Months 10‑12+): Grafts reach full thickness and natural texture. The final “after” picture is usually captured at 12 months.
When reviewing male hair transplant galleries, pay attention to the angle of the hairline and the blending with existing hair. For female hair transplant before and after examples, observe the softness of the frontal area and the overall balance.
Remember that individual results can vary based on the factors listed in the previous section. A transparent clinic will provide a series of images that document each stage, not just a dramatic 12‑month snapshot.
Tips for Choosing Reliable Photo Galleries and Clinics
With the popularity of Turkish hair transplant tourism, many websites showcase impressive galleries—some of which may be overly edited. Follow these guidelines to verify authenticity:
- Check for Time Stamps: Authentic galleries label each photo with the month post‑procedure.
- Look for Consistent Angles: The same camera angle and distance should be used throughout the series.
- Seek Patient Testimonials: Real‑world feedback often accompanies genuine photo sets.
- Verify Surgeon Credentials: Clinics that display surgeon certifications and years of experience tend to be more trustworthy.
- Ask for Raw Images: Reputable centers are willing to share unedited photos upon request.
When you search for hair transplant Turkey before and after or Turkish hair transplant before and after, prioritize clinics that provide a full timeline, include both male and female cases, and clearly state the technique used (FUE, DHI, etc.).
Finally, consider the clinic’s commitment to post‑operative follow‑up. A center that offers regular check‑ups and personalized care will help you achieve the results reflected in the images you admire.
Why Choose Gold City Hair
Gold City Hair combines over six years of experience with cutting‑edge FUE and DHI techniques, delivering natural‑looking results that match the authenticity shown in genuine before‑and‑after galleries. Our team prioritizes transparent communication, personalized treatment plans, and meticulous post‑operative care, ensuring each patient’s journey is documented with honest, high‑quality photographs. Located in Istanbul, we serve an international clientele seeking safe, affordable, and effective hair restoration.
Ready to see your own transformation? Contact Gold City Hair today to schedule a free, no‑obligation consultation and receive a personalized photo roadmap of your expected results.
FAQ
How can I tell if hair transplant before and after photos are authentic?
Look for consistent lighting, angles, timestamps, and the absence of obvious Photoshop edits.
What are the main differences between FUE, DHI, and FUT techniques in photos?
FUE shows micro‑dot donor scars and a natural hairline; DHI often displays a denser crown; FUT may reveal a linear scar that disappears with longer hair.
How long does it take to see the final results after a hair transplant?
Full, permanent results are typically visible around 12 months post‑procedure.
Why is it important to look at multiple time‑point photos (3, 6, 12 months)?
Multiple time‑points show the progression of graft survival and help set realistic expectations.
What factors affect the quality of before and after hair transplant images?
Patient age, hair type, graft survival, surgeon skill, post‑op care, and consistent photography conditions.
How does Gold City Hair ensure natural‑looking results?
Gold City Hair uses advanced FUE and DHI techniques, experienced surgeons, and strict photo documentation standards.